Difference between revisions of "3d printer"
From Fixme.ch
(Added new STL source) |
(Added yeggi search engine) |
||
| Line 56: | Line 56: | ||
| align="center" style="background:#FFFFE0;" |? | | align="center" style="background:#FFFFE0;" |? | ||
|} | |} | ||
| + | |||
| + | [http://www.yeggi.com/ Yeggi] is a search engine that shows results from several of the sites listed above. | ||
=== Make your own === | === Make your own === | ||
Revision as of 21:55, 2 October 2013
|
3D models
Find model online
| Name | Description | Requires registration? |
|---|---|---|
| Thingiverse | Largest go to source for 3D models | No |
| Cubehero | Open source source based on git | No |
| YouMagine | New repository for 3D models | No |
| Shapeking | Excellent alternative to thingiverse | No |
| The Pirate Bay | Torrents of miscellaneous 3D models | No |
| Defcad | Controversial thingiverse clone | ? |
| Makerlove | 3D printed sex toys | No |
| 3DCC | Technical models | ? |
| GrabCAD | Models mostly for CNC and design | Yes |
| Shapeways | Shapeways tested 3D models | Yes |
| US .gov repository | Backed by the NSA | ? |
Yeggi is a search engine that shows results from several of the sites listed above.
Make your own
3D Software
- Sketchup is a free, popular and most importantly, easy to use software which allows for the quick creation of 3D models (requires su2stl plugin for STL export/import)
- Sketchup 2013 Mac
- Sketchup 2013 Windows
- Sketchup 8 Windows (This version works with wine)
- OpenSCAD is a script-based 3D editor, which can make use of parameters, conditions, for and while loops, etc... This is currently Petaflot's choice
- 3DTin is an online WebGL 3D modeling web-app
- Netfabb (Linux version)
Printing software
- https://print.fixme.ch web interface to replace Printrun/Cura (still need Slic3r to create the gcode)
- Currently not connected to the printer and the service is down
- run as unprivlilegied user please sudo su -c /home/francois/OctoPrint/run francois
- Used for the webcam: http://webcam.fixme.ch
- Slic3r and Printrun
- To check, http://projectsilkworm.com/
- Check STL files for printability: http://cloud.netfabb.com/
- Buy material in switzerland: Resources#3D_Printer
- There's a dedicated machine to print: spm.fixme.ch
Printing
Software Installation
- http://daid.github.com/Cura/
- it's the only software worth it
- Yes, you will need PyOpenGL for it to run. Displaying nice 3d images is not that trivial.
- Recommended: Use the dev version on github: https://github.com/daid/Cura.git (12.10 when I'm writing)
- Required packages: wxPython and PyOpenGL.
- You can use a python virtualenv.
First use
- On first Cura start, you don't need to upgrade to Marlin firmware because it's already done.
- You should run the checks, at least to check if USB connection between PC and the printer is working. For temperature check, the printer need to cool down (to ~30) before heating and check, it can take looong time.
- Now you can use Cura to print objects.
Printing
Maximum length/width: 180mm
- Load a .stl model.
- Change orientation, size, etc...
- Check settings on the left (and in the different tabs)
- Click on the Prepare print button.
- Software will slice the object into GCode. The more you choose a large scale object, the longer the execution time is.
- When it done, click on Print button to open the Printing dialog.
- Wait the software connect with the printer, Connection button will turn from clickable to readonly and Print button will turn from readonly to clickable.
- Set the temperature with the arrows (yeah it's not working by putting the number directly)
- Wait a bit so the hot end is distributively warmed
- Extrude before printing, so the wire is at the start of the hot end
- Make sure the wire is extruding correctly (the output wire is regular)
- Click the Print button.
Settings
- Walls: 0.4 (1 wall) is good
- Print speed: 80mm/s is clean (you may increase temperature for more speed)
- Infill:
- strong material, 80-100%
- Light print, 10-15%
- Temparatures: ~230-240°
- Support type:
- Exterior when there's a big overhang (we made a 10cm overhang without support, but generally it's >1cm)
- None in general
- Raft: needed when there are small pieces at the bottom (so they stick to the bed)
- Experiment !
Important points
- KEEP YOUR EYES ON THE PRINTER THROUGHOUT THE PRINTING PROCESS!!! And clean what could interfere with the printing.
- BE carefull with the end stops, if they don't work, turn OFF the printer immediatly and fix them (by bending the metal part a little bit for instance)
After printing
- If a pile of plastic has formed in the extruder, remove the wire complitely and cut it
- Put the leftover in the box, maybe one day we'll be able to recycle it!
Finance
- To buy new PLA filament and upgrade parts, there's a piggy bank next to the printer
- The cost in filament is indicated by Cura, just take a guess to add general maintenance cost of the printer
Files
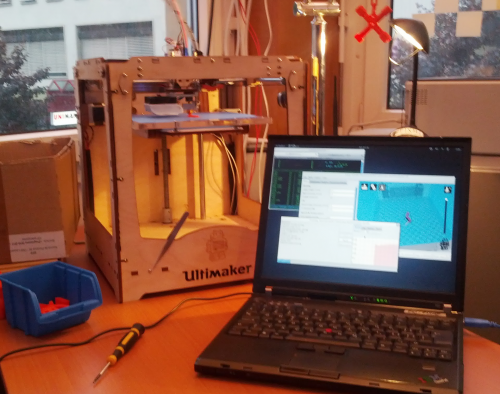
You can find 3D models to print from this list of websites. There is also a folder full of previously printed STL's on the machine attached to the Ultimaker.
- FIXME keychain: File:Fixme-key.stl
- Tablet support: File:Tablet-support.stl
- Pincette: File:Pincette-led.stl File:Pincette-piles.stl
Photos
Webcam
- An AXIS webcam is deployed on the printer and accessible by IP: http://62.220.135.212
- There's a service for viewing the webcam
- https://webcam.fixme.ch
- Repo is in github: https://github.com/fixme-lausanne/fixme-webcam
- Auto-deploy by pushing on the
livebranch inssh://gitolite@git.fixme.ch:1337/fixme-webcam
Maintenance
Issues to fix
- End stops are getting crapy
- Belt tension is bad
- Y alignement problems
- Fan can't be turned off (electrical problem?)
-
http://wiki.ultimaker.com/Jamming -
Needs a new tube and fixation -
One of the nozzle is loose. When the extrusion begins, the pipe move -
Belt tension: https://www.youtube.com/watch?v=grHmmmSoOfc& -
Thermocoupler and the heater are stuck in the head
Todo
Stuff to print
New parts
- Ordered and installed May 2013
- Advices from FabLab Munchen: https://plus.google.com/u/0/118147898615631299121/posts/Kckxn1ssgUt
- Self-printer alternatives
- http://www.thingiverse.com/thing:26094 Extruder upgrade
Other resources
- Filabot (recycling): buy kickstarter
- 3D scanner with Camera + Laser + MatLab + MeshLab
- http://themartinlab.tumblr.com/post/51803765008/10-things-i-wish-i-wouldve-known-before-owning-a-3d
- http://spiderbot.eu/
- Smoothing PLA
- Drag&Drop page to easily transfert a .stl file to the server [1]
