Difference between revisions of "3d printer"
From Fixme.ch
(Added link about smoothing/polishing PLA) |
|||
| Line 1: | Line 1: | ||
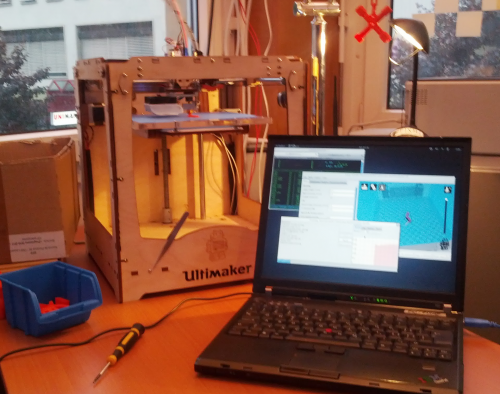
[[File:Ultimaker.png|500px]] | [[File:Ultimaker.png|500px]] | ||
| − | == | + | == Software == |
| − | * http:// | + | === 3D Software === |
| − | * | + | * [http://www.sketchup.com/ Sketchup] is a free, popular and most importantly, easy to use software which allows for the quick creation of 3D models (requires [http://rhin.crai.archi.fr/rld/plugin_details.php?id=429 su2stl plugin] for STL export/import) |
| − | ** [http://openscad.org OpenSCAD] is a script-based 3D editor | + | ** [ftp://fixme@ftp.fixme.ch/incoming/SketchUp%202013%20(Mac).dmg Sketchup 2013 Mac] |
| − | * | + | ** [ftp://fixme@ftp.fixme.ch/incoming/SketchUp%202013%20(Windows).exe Sketchup 2013 Windows] |
| − | * | + | ** [ftp://fixme@ftp.fixme.ch/incoming/Sketchup%208%20(Wine).zip Sketchup 8 Windows] (This version [http://wiki.winehq.org/Sketchup works with wine]) |
| − | + | * [http://openscad.org OpenSCAD] is a script-based 3D editor, which can make use of parameters, conditions, for and while loops, etc... This is currently Petaflot's choice | |
| − | + | * [http://www.3dtin.com/ 3DTin] is an online WebGL 3D modeling web-app | |
| − | + | * [http://www.netfabb.com/download.php Netfabb] (Linux version) | |
| − | + | ||
| − | + | === Printing software === | |
| − | + | * https://print.fixme.ch web interface to replace Printrun/Cura (still need Slic3r to create the gcode) | |
| + | ** Currently not connected to the printer | ||
| + | ** Used for the webcam: http://62.220.135.248:8081/stream.mjpg | ||
| + | * [http://slic3r.org/ Slic3r] and [http://reprap.org/wiki/Printrun Printrun] | ||
** [https://github.com/daid/Cura Cura] | ** [https://github.com/daid/Cura Cura] | ||
* To check, http://projectsilkworm.com/ | * To check, http://projectsilkworm.com/ | ||
Revision as of 02:38, 19 June 2013
Contents
[hide]Software
3D Software
- Sketchup is a free, popular and most importantly, easy to use software which allows for the quick creation of 3D models (requires su2stl plugin for STL export/import)
- Sketchup 2013 Mac
- Sketchup 2013 Windows
- Sketchup 8 Windows (This version works with wine)
- OpenSCAD is a script-based 3D editor, which can make use of parameters, conditions, for and while loops, etc... This is currently Petaflot's choice
- 3DTin is an online WebGL 3D modeling web-app
- Netfabb (Linux version)
Printing software
- https://print.fixme.ch web interface to replace Printrun/Cura (still need Slic3r to create the gcode)
- Currently not connected to the printer
- Used for the webcam: http://62.220.135.248:8081/stream.mjpg
- Slic3r and Printrun
- To check, http://projectsilkworm.com/
- Check STL files for printability: http://cloud.netfabb.com/
- Buy material in switzerland: Resources#3D_Printer
Cura for printing
Installation
- http://daid.github.com/Cura/
- it's the only software worth it
- Yes, you will need PyOpenGL for it to run. Displaying nice 3d images is not that trivial.
- Recommended: Use the dev version on github: https://github.com/daid/Cura.git (12.10 when I'm writing)
- Required packages: wxPython and PyOpenGL.
- You can use a python virtualenv.
First use
- On first Cura start, you don't need to upgrade to Marlin firmware because it's already done.
- You should run the checks, at least to check if USB connection between PC and the printer is working. For temperature check, the printer need to cool down (to ~30) before heating and check, it can take looong time.
- Now you can use Cura to print objects.
Printing
- Load a .stl model.
- Change orientation, size, etc...
- Check settings on the left (and in the different tabs)
- Click on the Prepare print button.
- Software will slice the object into GCode. The more you choose a large scale object, the longer the execution time is.
- When it done, click on Print button to open the Printing dialog.
- Wait the software connect with the printer, Connection button will turn from clickable to readonly and Print button will turn from readonly to clickable.
- Set the temperature with the arrows (yeah it's not working by putting the number directly)
- Wait a bit so the hot end is distributively warmed
- Extrude before printing, so the wire is at the start of the hot end
- Make sure the wire is extruding correctly (the output wire is regular)
- Click the Print button.
Settings
- Walls: 0.4 (1 wall) is good
- Print speed: 80mm/s is clean (you may increase temperature for more speed)
- Infill:
- strong material, 80-100%
- Light print, 10-15%
- Temparatures: ~230-240°
- Support type:
- Exterior when there's a big overhang (we made a 10cm overhang without support, but generally it's >1cm)
- None in general
- Raft: needed when there are small pieces at the bottom (so they stick to the bed)
- Experiment !
Important points
- KEEP YOUR EYES ON THE PRINTER THROUGHOUT THE PRINTING PROCESS!!! And clean what could interfere with the printing.
- BE carefull with the end stops, if they don't work, turn OFF the printer immediatly and fix them (by bending the metal part a little bit for instance)
After printing
- If a pile of plastic has formed in the extruder, remove the wire complitely and cut it
- Put the leftover in the box, maybe one day we'll be able to recycle it!
Finance
- To buy new PLA filament and upgrade parts, there's a piggy bank next to the printer
- The cost in filament is indicated by Cura, just take a guess to add general maintenance cost of the printer
Issues to fix
- End stops are getting crapy
- Belt tension is bad
- Y alignement problems
- Fan can't be turned off (electrical problem?)
-
http://wiki.ultimaker.com/Jamming -
Needs a new tube and fixation -
One of the nozzle is loose. When the extrusion begins, the pipe move -
Belt tension: https://www.youtube.com/watch?v=grHmmmSoOfc& -
Thermocoupler and the heater are stuck in the head
Todo
Stuff to print
Files
- FIXME keychain: File:Fixme-key.stl
- Tablet support: File:Tablet-support.stl
- Pincette: File:Pincette-led.stl File:Pincette-piles.stl
Photos
New parts
- Ordered and installed May 2013
- Advices from FabLab Munchen: https://plus.google.com/u/0/118147898615631299121/posts/Kckxn1ssgUt
- Self-printer alternatives
- http://www.thingiverse.com/thing:26094 Extruder upgrade
