Difference between revisions of "Joule Thief"
From Fixme.ch
m (moved Joule Thieve to Joule Thief: my english really sucks) |
|||
| (One intermediate revision by the same user not shown) | |||
| Line 11: | Line 11: | ||
* a simple led triggered by 1.4 volts | * a simple led triggered by 1.4 volts | ||
* a PNP transistor (in this case the 2N3904) | * a PNP transistor (in this case the 2N3904) | ||
| + | |||
| + | * The component are in the green box | ||
| + | |||
| + | [[File:Green_box.jpg|600px]] | ||
| + | |||
| + | Yes, This green box !! | ||
| + | |||
== How to == | == How to == | ||
The circuit is as followed : | The circuit is as followed : | ||
| Line 17: | Line 24: | ||
The bread board can be assembled as followed. | The bread board can be assembled as followed. | ||
| − | [[File:Joule_Bread.jpg]] | + | |
| − | [[File:Joule_oscillo.jpg | + | [[File:Joule_Bread.jpg|600px]] |
| − | + | ||
| + | And the resulting voltage on the side on the led should like like | ||
| + | |||
| + | [[File:Joule_oscillo.jpg|600px]] | ||
== What is happening there ? == | == What is happening there ? == | ||
Latest revision as of 02:25, 13 May 2012
Goal
- Learn a way to use end of life batteries
Level
- You should already have done something on breadboard, it would make your life easier. But it's still nice as an introduction to it.
Component
- A ferrite core
- Some cable to do the solenoide
- a resistor (We don't really care about the ohm, between 100 and 400 should do the trick :))
- a simple led triggered by 1.4 volts
- a PNP transistor (in this case the 2N3904)
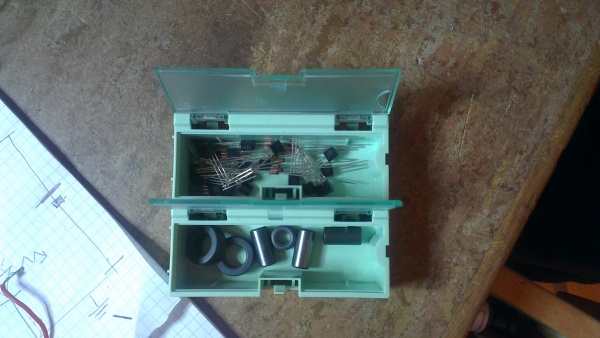
- The component are in the green box
Yes, This green box !!
How to
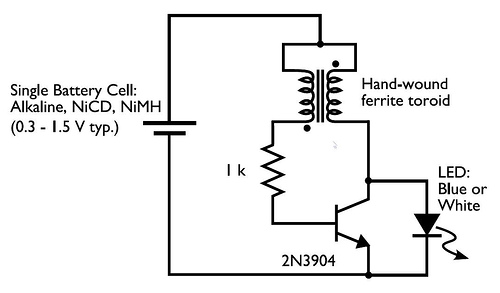
The circuit is as followed :
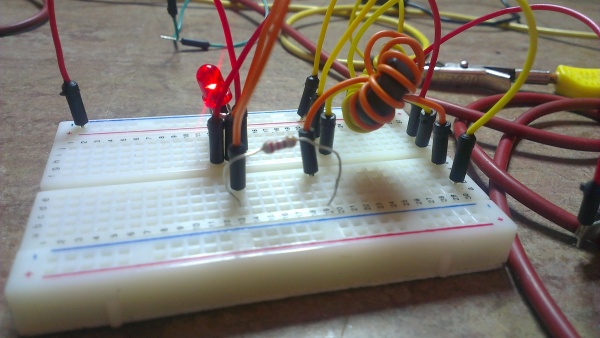
The bread board can be assembled as followed.
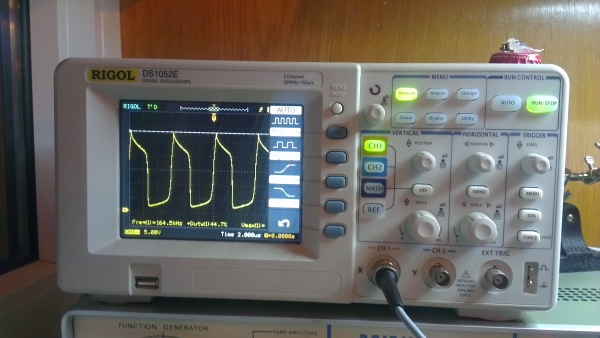
And the resulting voltage on the side on the led should like like


