Difference between revisions of "3d printer"
From Fixme.ch
(Added link about auto bed leveling) |
(→3D Software: Nervous System) |
||
| Line 93: | Line 93: | ||
* [http://www.3dtin.com/ 3DTin] is an online WebGL 3D modeling web-app | * [http://www.3dtin.com/ 3DTin] is an online WebGL 3D modeling web-app | ||
* [http://www.netfabb.com/download.php Netfabb] (Linux version) | * [http://www.netfabb.com/download.php Netfabb] (Linux version) | ||
| + | * http://n-e-r-v-o-u-s.com/cellCycle/ un outil web marant pour designer (puis commander le cas échéant) des bagues, bracelets.. d'autres ressources sur le site. | ||
==== Printing software ==== | ==== Printing software ==== | ||
Revision as of 15:06, 7 May 2014

|
Usage
- Prepare a 3D model to print. You can find a model online with sites such as Thingiverse, or create your own in software such as Sketchup or OpenSCAD. You will need to save the model as a .STL file, however .DAE can also be used for direct exports from Sketchup.
- Import your model onto the print computer. It is easiest if you print using our dedicated print computer (Fixme-SPM) which is located next to the printer. You can import the model by dragging it into the drag and drop service, using a USB key, using IRC, or using a cloud hosting service such as Ge.tt or Mega.
- Open Cura and open your model(s). Open Cura from the sidebar, and click on the Load button. Select one or more .STL or .DAE files that you would like to print. Please note that prints that reach near the limits of the print volume (21 x 21 x 20.5 cm) will fail.
- Configure your desired print parameters. The print parameters will depend on what you are printing and the quality that you're looking for. Here are some guidelines:
- Layer height: the Ultimaker can print between 0.1mm and 0.25mm. 0.1mm should only be used for high precision, high detail prints; 0.15mm should be used for normal prints; 0.2-0.25mm should be used for fast prints where you don't mind the quality (e.g. holder, internal component, etc).
- Shell thickness: this value should be a multiple of 0.4mm (the width of the nozzle). With 0.4mm you'll get 1 solid layer, with 0.8mm you'll get 2 solid layers, etc. 0.8mm is fine for most prints.
- Enable retraction: this retracts the filament when the nozzle moves from one area to another whilst not printing. It is best to leave this enabled.
- Bottom/top thickness: the bottom and top thickness of the solid layer. This value should be a multiple of the layer height - a value between 0.2mm and 1mm is best for most prints, with 1mm used for very delicate models.
- Fill density: this is the density of the fill inside your model. Due to an excellent calibration of our Ultimaker, almost all prints will require less than 30% fill. 10% for just structural support, 24% for an average print (after 25% Cura slices your model differently), 30% for a solid print of an average sized object. For objects that require superior structural strength, up to 60% is recommended. 80% can be used for very small complex objects, and 100% is used on a case-by-case basis.
- Print speed: this is the speed at which the Ultimaker will print. 100mm/s is recommended for detailed prints, 120mm/s for average prints, and up to 150mm/s for fast, lower quality prints.
- Printing temperature: we have tested and 235°C works best. Leave it as is.
- Support type: only use for prints with significant overhangs.
- Platform adhesion type: not required for PLA prints.
- Diameter: the diameter of the filament (currently 2.89mm). Do not touch this unless you are changing the filament and have remeasured it (sometimes the value does not match the specification).
- Flow: I have no clue what this does. If it ain't broke, don't touch it.
3D models
Find model online
| Name | Description | Requires registration? |
|---|---|---|
| Repables | Fully open repository backed by non profit | No |
| Thingiverse | Largest go to source for 3D models | No |
| Cubehero | Open source source based on git | No |
| YouMagine | New repository for 3D models | No |
| Shapeking | Excellent alternative to thingiverse | No |
| The Pirate Bay | Torrents of miscellaneous 3D models | No |
| Defcad | Controversial thingiverse clone | ? |
| Makerlove | 3D printed sex toys | No |
| 3DCC | Technical models | ? |
| GrabCAD | Models mostly for CNC and design | Yes |
| Shapeways | Shapeways tested 3D models | Yes |
| 3dagogo | 'Tested' parts 'guaranteed' to print | ? |
| US .gov repository | Backed by the NSA | ? |
Yeggi is a search engine that shows results from several of the sites listed above.
Make your own
3D Software
- Sketchup is a free, popular and most importantly, easy to use software which allows for the quick creation of 3D models (requires su2stl plugin for STL export/import)
- Sketchup 2013 Mac
- Sketchup 2013 Windows
- Sketchup 8 Windows (This version works with wine)
- OpenSCAD is a script-based 3D editor, which can make use of parameters, conditions, for and while loops, etc... This is currently Petaflot's choice
- 3DTin is an online WebGL 3D modeling web-app
- Netfabb (Linux version)
- http://n-e-r-v-o-u-s.com/cellCycle/ un outil web marant pour designer (puis commander le cas échéant) des bagues, bracelets.. d'autres ressources sur le site.
Printing software
- https://print.fixme.ch web interface to replace Printrun/Cura (still need Slic3r to create the gcode)
- Currently not connected to the printer and the service is down
- run as unprivlilegied user please sudo su -c /home/francois/OctoPrint/run francois
- Used for the webcam: http://webcam.fixme.ch
- Slic3r and Printrun
- To check, http://projectsilkworm.com/
- Check STL files for printability: http://cloud.netfabb.com/
- Buy material in switzerland: Resources#3D_Printer
- There's a dedicated machine to print: spm.fixme.ch
Printing
Software Installation
- http://daid.github.com/Cura/
- it's the only software worth it
- Yes, you will need PyOpenGL for it to run. Displaying nice 3d images is not that trivial.
- Recommended: Use the dev version on github: https://github.com/daid/Cura.git (12.10 when I'm writing)
- Required packages: wxPython and PyOpenGL.
- You can use a python virtualenv.
First use
- On first Cura start, you don't need to upgrade to Marlin firmware because it's already done.
- You should run the checks, at least to check if USB connection between PC and the printer is working. For temperature check, the printer need to cool down (to ~30) before heating and check, it can take looong time.
- Now you can use Cura to print objects.
Printing
Maximum length/width: 180mm
- Load a .stl model.
- Change orientation, size, etc...
- Check settings on the left (and in the different tabs)
- Click on the Prepare print button.
- Software will slice the object into GCode. The more you choose a large scale object, the longer the execution time is.
- When it done, click on Print button to open the Printing dialog.
- Wait the software connect with the printer, Connection button will turn from clickable to readonly and Print button will turn from readonly to clickable.
- Set the temperature with the arrows (yeah it's not working by putting the number directly)
- Wait a bit so the hot end is distributively warmed
- Extrude before printing, so the wire is at the start of the hot end
- Make sure the wire is extruding correctly (the output wire is regular)
- Click the Print button.
Settings
- Walls: 0.4 (1 wall) is good
- Print speed: 80mm/s is clean (you may increase temperature for more speed)
- Infill:
- strong material, 80-100%
- Light print, 10-15%
- Temparatures: ~230-240°
- Support type:
- Exterior when there's a big overhang (we made a 10cm overhang without support, but generally it's >1cm)
- None in general
- Raft: needed when there are small pieces at the bottom (so they stick to the bed)
- Experiment !
Important points
- KEEP YOUR EYES ON THE PRINTER THROUGHOUT THE PRINTING PROCESS!!! And clean what could interfere with the printing.
- BE carefull with the end stops, if they don't work, turn OFF the printer immediatly and fix them (by bending the metal part a little bit for instance)
After printing
- If a pile of plastic has formed in the extruder, remove the wire complitely and cut it
- Put the leftover in the box, maybe one day we'll be able to recycle it!
Finance
- To buy new PLA filament and upgrade parts, there's a piggy bank next to the printer
- The cost in filament is indicated by Cura, just take a guess to add general maintenance cost of the printer

Files
You can find 3D models to print from this list of websites. There is also a folder full of previously printed STL's on the machine attached to the Ultimaker.
- FIXME keychain: File:Fixme-key.stl
- Tablet support: File:Tablet-support.stl
- Pincette: File:Pincette-led.stl File:Pincette-piles.stl
Photos
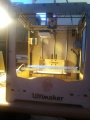
Ultimaker 3D printer
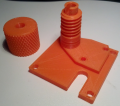
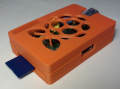
Raspberry Pi case

Cells Ball
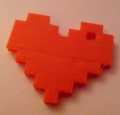
8bit Heart
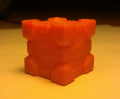
Companion Cube (Portal)
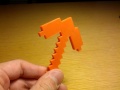
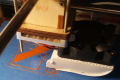
Pickaxe

Keychain
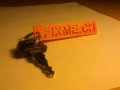
Keychain 2
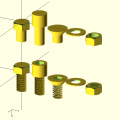
Metric bolts
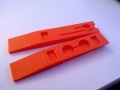
Pincette aimantée
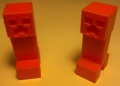
Creepers
Chaine

Closeup Video


Webcam
- An AXIS webcam is deployed on the printer and accessible by IP: http://62.220.135.212
- There's a service for viewing the webcam
- https://webcam.fixme.ch
- Repo is in github: https://github.com/fixme-lausanne/fixme-webcam
- Auto-deploy by pushing on the
livebranch inssh://gitolite@git.fixme.ch:1337/fixme-webcam
Maintenance
Issues to fix
- End stops are getting crapy
- Belt tension is bad
- Y alignement problems
- Fan can't be turned off (electrical problem?)
- Fan duct melts and scrapes the print/print surface
- Needs to be re-printed more often or made in a more heat-resistant material
- Prints fail if they reach near the edges of the print surface
- The current green filament is shitty and breaks all the time
Fixed Issues
-
http://wiki.ultimaker.com/Jamming -
Needs a new tube and fixation -
One of the nozzle is loose. When the extrusion begins, the pipe move -
Belt tension: https://www.youtube.com/watch?v=grHmmmSoOfc& -
Thermocoupler and the heater are stuck in the head
Todo
Stuff to print
- New fan: http://www.thingiverse.com/thing:25611
-
Buy a wood chisel set- done
New parts
- Ordered and installed May 2013
- Advices from FabLab Munchen: https://plus.google.com/u/0/118147898615631299121/posts/Kckxn1ssgUt
- Self-printer alternatives
- http://www.thingiverse.com/thing:26094 Extruder upgrade
Other resources
- Filabot (recycling): buy kickstarter
- 3D scanner with Camera + Laser + MatLab + MeshLab
- http://themartinlab.tumblr.com/post/51803765008/10-things-i-wish-i-wouldve-known-before-owning-a-3d
- http://spiderbot.eu/
- Smoothing PLA
- Drag&Drop page to easily transfert a .stl file to the server [1]
- http://reprap.org/wiki/Print_Troubleshooting_Pictorial_Guide
- 3D printed 'velcro'
- Improved 3D printer extruder (for PVC and other plastics)
- http://hackaday.com/2014/01/13/fastening-3d-printed-parts/
- http://hackaday.com/2014/01/28/fabrickation-combining-lego-and-3d-printing/
- http://hackaday.com/2014/03/19/ask-hackaday-auto-bed-leveling-and-high-temperature-force-sensitive-resistors/